


How to make Arctic Art!
Learn how to paint the perfect polar picture…
Calling all young artists! Follow the steps below to create your own amazing Arctic scene silhouetted against the Northern Lights. Wow!
How to make Arctic Art
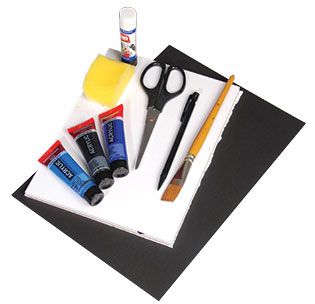
What you’ll need…
Thick white paper (watercolour paper if possible)
Sponge
Paints and paint brushes
Pencil
Black paper or card
Scissors
Glue
Step 1
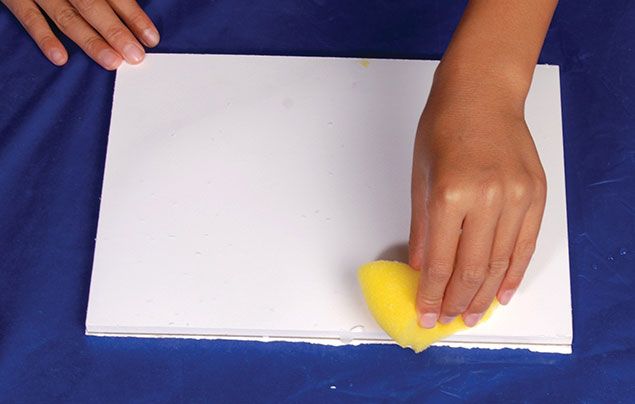
First, wet your paper with a sponge. This will help the colours spread and bleed across the paper.
Step 2
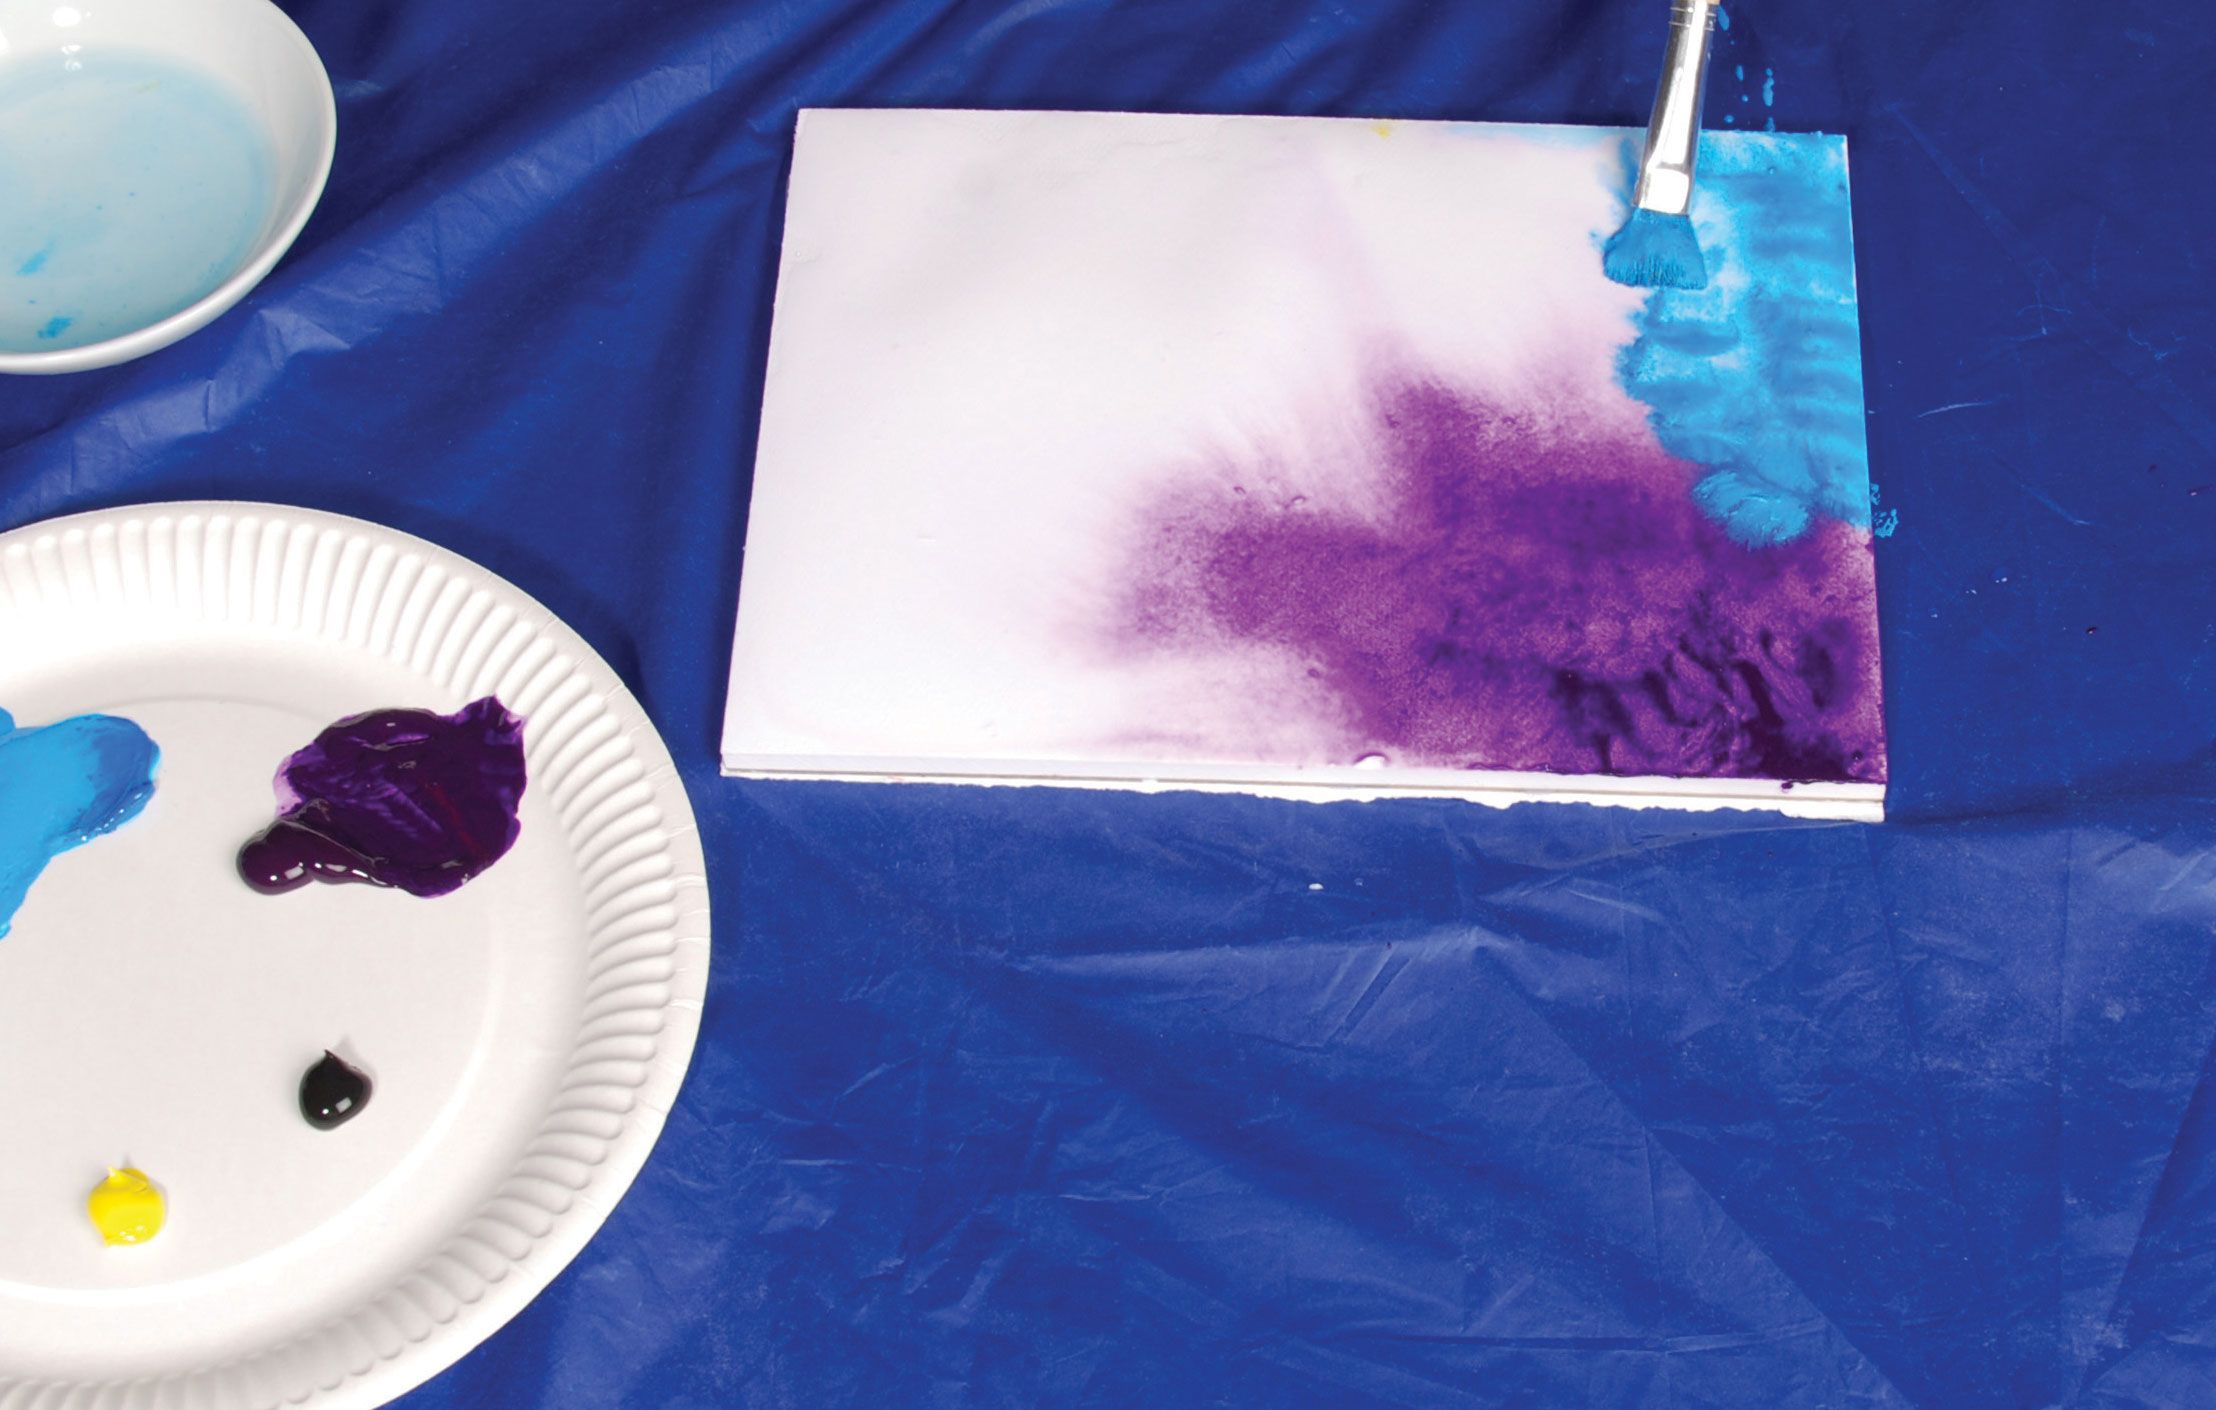
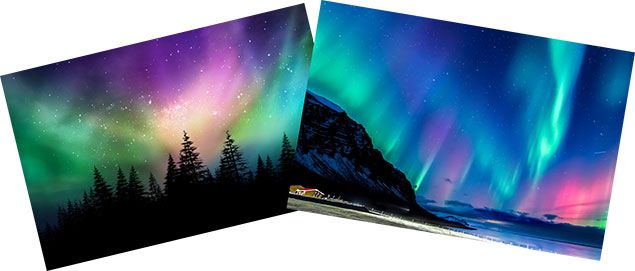
Looking at the pics (top of page) for inspiration, apply paint to the wet paper to create a swirling Arctic sky lit up with the Northern Lights!
Step 3

Try swiping some of the wet paint away with a dry sponge to create streaks of light. When you’re happy with the effect, leave it to dry.
Step 4
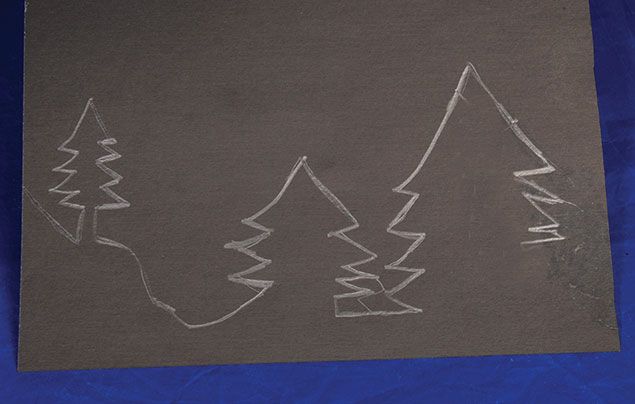
Using a piece of black paper the same width as your painting, draw the outline of some pine trees or mountains using a pencil.
Step 5
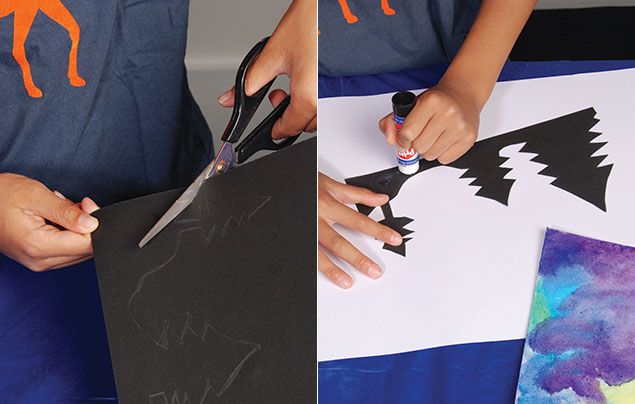
Carefully cut around this outline, then stick it onto the painting to finish off your magical scene!
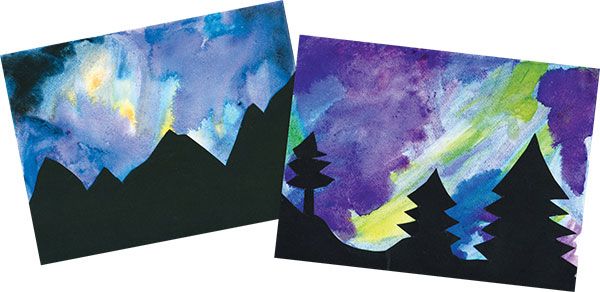
Top tip: if you really put your art skills to the test, see what different things you can include in your silhouette! Maybe a bird on the tree top? Or a wolf on the mountain?!
Like our Arctic Art craft? Let us know what you think by leaving a comment, below!
More Like
Earth Day!


LEAVE A COMMENT
THANK YOU
Your comment will be checked and approved shortly.
WELL DONE,
YOUR COMMENT
HAS BEEN ADDED!
COMMENTS
Can't wait to see!
Awesome! do you have anymore of your awesome projects and crafts? If not please make them and show me them they are spectacular!
LOL!
CUSTOMIZE YOUR AVATAR