How to make a wind chime
Celebrate summer with this cool craft…
Calling all creative kids! Welcome the sounds of summer to your garden, balcony or window with these musical wind chimes…
How to make a wind chime

What you’ll need…
Small terracotta pot
Acrylic paints
Pencil
Black permanent marker (or paint)
Paint brush or sponge
String
Buttons
Noisy decorations such as bells, beads, washers, old spoons or keys
Step 1

First, give your pot a good clean with a cloth to remove any dirt or dust, making it nice and smooth for painting on. Now paint your pot a bright colour.
Step 2

Using a black marker pen or pencil, mark your pattern on your pot, then colour it in with paints or your pen. You could do an animal design – we’ve done a bumblebee and a ladybird!
Step 3

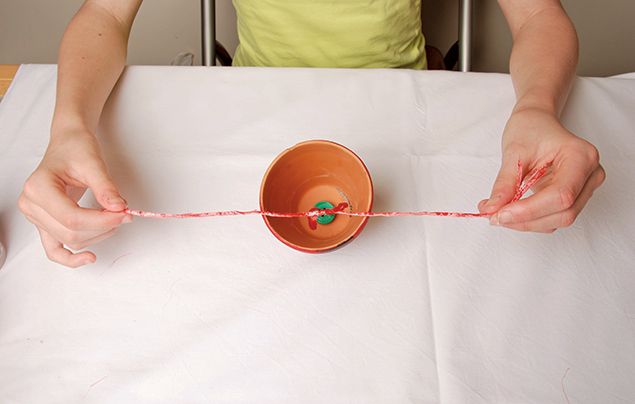
Cut a length of string 60cm long and thread both ends through a button, creating a hoop. Make sure the button’s bigger than the hole in the top of your pot. Next, tie a knot in the loop above your button.
Step 4

Thread the loose ends through the hole in your pot and through another button inside the pot. Then tie a knot inside the pot. You now have a button inside, with the top of the pot in between the other button on the outside, with the loop of the string poking out.
Step 5

Now add some sounds! Use bells, spoons, forks, keys or anything metal or hollow that will clang together in the wind to make a noise, and tie them to the loose pieces of string. Now use your loop to hang your wind chime in the garden and let the chimes begin!
TOP TIP
Be creative with your design. What about a spider with six wind-chime legs?! Or a green, creepy alien with dangling wind-chime tentacles?!
Like our how to make a wind chime article? Let us know what you think by leaving a comment, below!
More Like

Max in the Colosseum

India facts: discover this incredible country

Autumn Animals!


LEAVE A COMMENT
THANK YOU
Your comment will be checked and approved shortly.
WELL DONE,
YOUR COMMENT
HAS BEEN ADDED!
COMMENTS
CUSTOMIZE YOUR AVATAR